
In an emergency situation, oftentimes you don’t have all of the parts and pieces that you need to build things and access to these parts would be difficult at best.
So thinking outside of the box can really pay off.
PVC Pipe Emergency Drip-irrigation for Garden
Materials needed:
• Heat source (hot coals from a waning fire, briquettes, etc.)
• PVC pipe (I use 3/4”, but any size will work)
• 5 gallon plastic bucket
• Hack saw
• Cotton rags
Directions-
1. Making the point: Take the PVC pipe and the hack saw, cut four slits about 3” long in one end of the pipe. Heat the pipe until soft and mold it tapering to a point (as shown). Let cool and file off excess edges.

2. Making the pipe-stop: Take the other end of that same PVC pipe and cut four slits down about 1” deep, then heat until soft. Smash onto a flat, hard surface so that the end flares outward. Hold until it cools.

This is the finished product:

3. Hole in bucket: Drill a 5/16” hole towards the bottom of the bucket. Then heat the area around the hole until soft. Then take the PVC pipe point that you made earlier and push the point through the small hole from the inside of the bucket. Note: This photo shows only a small part of a bucket purely for demonstrative purposes. You would use the whole bucket to hold the water for the irrigation process.


4. Cutting the point off: The point is used to aid in inserting the pipe through the small hole; but also to form a sealing shoulder on the bucket (as shown here).

Once the pipe has been pushed all the way through to the stop, the point is no longer needed. Cut it off. You will be attaching the rest of the pipes to this first pipe.


5. Making the bell: Take a regular piece of PVC pipe and heat approximately 1” of the end until soft. Then take another pipe and shove it into the soft end of the heated pipe, let cool and then you can pull the second pipe out. This makes a bell-shaped connection so that pipes can be easily connected together.


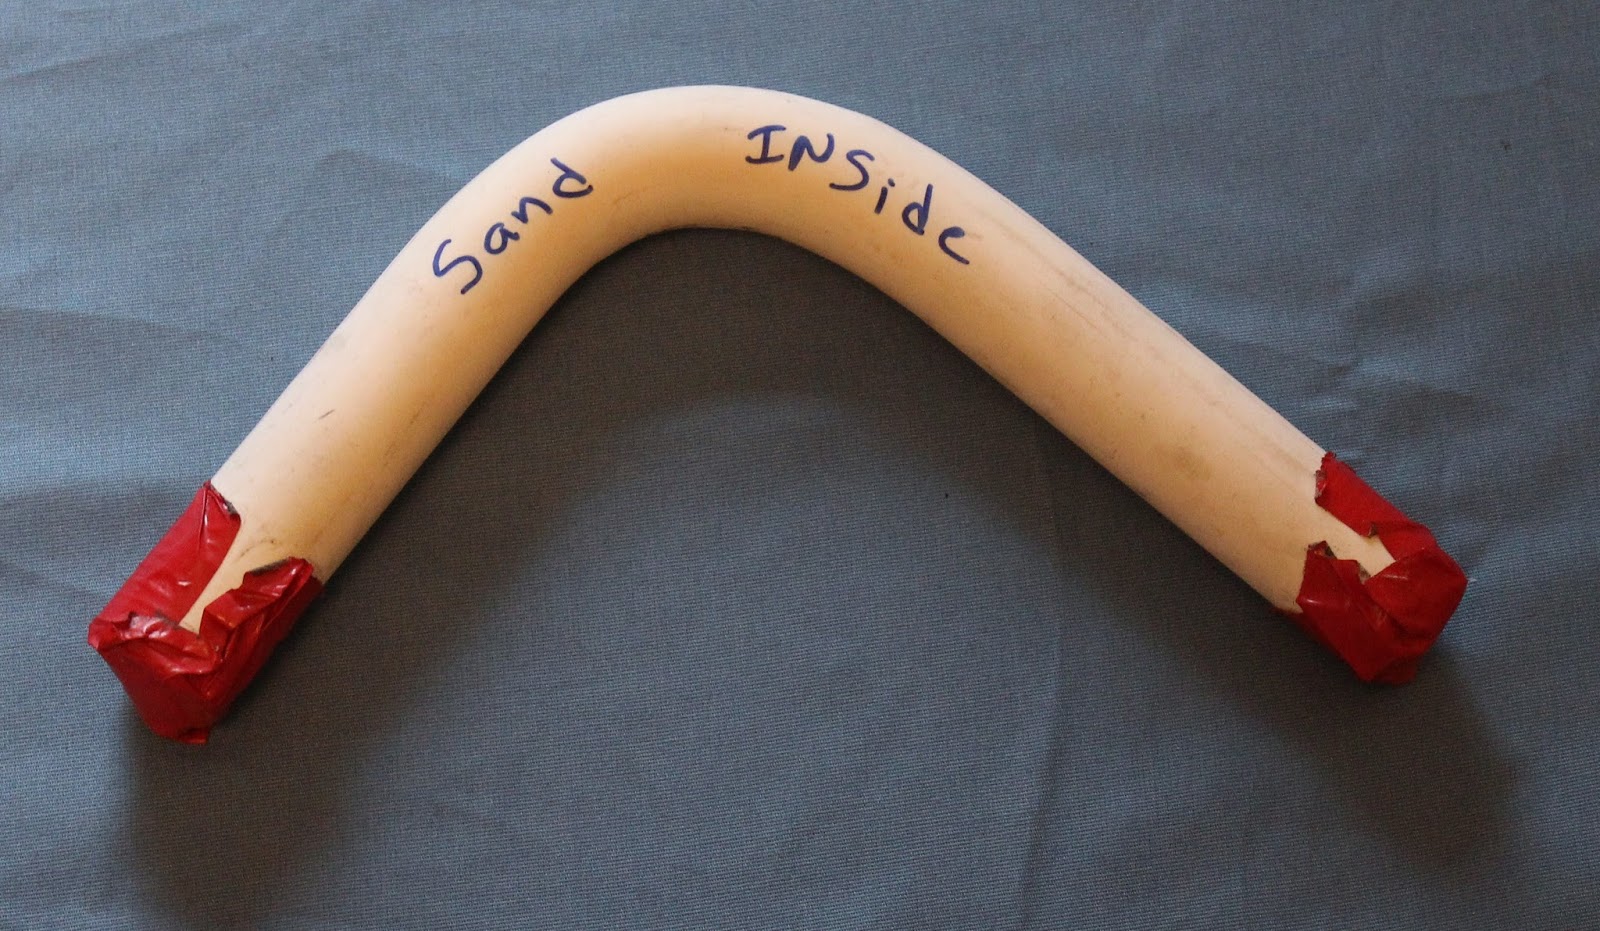
6. Making elbows (if needed): You may need to make an elbow if you need your makeshift irrigation system to turn a corner. To do this, you need to take a short piece of pipe and put duct tape on one end, then fill the pipe with sand, and then tape the other end shut. Heat the middle of the pipe and then bend it to your desired angle. Once it cools, dump the sand out.
7. Drip pipe: Wherever there is a plant, drill 3/8” holes clear through the pipe. Take a short piece of a cotton rag and roll it to fill the hole with a small amount hanging over both sides.


8. Assembly: Your five gallon bucket holding the dirty water needs to be sitting on something two or three feet in the air so that gravity will feed the water through the pipe. Use cinderblocks or an upside down barrel etc. Start connecting your pipes to the pipe coming out of the bucket and run the pipe alongside the plants. Start drilling holes wherever the plants are and stuff the rags into the holes (The reason why regular drip nozzles won’t work is that they plug with dirty water). At the very end of your system, plug the pipe with something or heat it and smash it until cool. Fill the bucket with water as needed and watch your plants grow.
Afterthought: If you do have steel pipe and desire to connect to the plastic pipes, heat the metal pipe for about 10-15 seconds, shove the metal pipe inside the plastic pipe, and cinch down with a hose clamp on the joint to embed the threads of the steel pipe into the plastic pipe. You can take the hose clamp off once it cools. This also works using plastic bottles if you desire to use them for a funnel or to connect another type of container to your piping system.
