Tuesday, December 15, 2015
Tuesday, November 24, 2015
Last Resort All-In-One Tent/Stove/Cooker
A few years ago I had an idea on how to make a lightweight, cheap survival tent/stove/cooker. A good tent with a wood stove is a ton of money so I came up with this idea to create a shelter with heat inside that you can also use to cook. It only cost me about 30 dollars or so. Now people that can’t afford much but want to be prepared still can be at a low, low cost. It is not as nice as a 2000 dollar set up but it works very well. I have tried it in the winter.
I have been changing designs trying to make it better. The first three pictures are the old design. The last two are the new.
These are two 4 inch stove pipes with a ring welded towards the top to hold a tarp up. The base is a short pipe with expanded metal welded onto the bottom and 2 steel stakes welded onto the sides. This design is 3 separate pieces, 2 chimney pipes and the bottom bracket that all slide together.
To light a fire, first drop some paper down the chimney followed by a small amount of fuel (briquettes, wood, etc.) and light it through the metal mesh at the bottom of the pipe.
(12-15 briquettes for the 4 inch (old design) was about right)
This is the new design. It is 6 inch tubing about 50 inches tall, expanded metal welded onto the bottom , 2 stakes welded onto the sides of the bottom, 2 handles welded on the sides of the pipe, a ring welded towards the top (in order to hold up the tarp).
Also, I found that the briquette chimney turned upside-down and placed on top of the chimney pipe can work as a pot skirt for a cooking pot.
The advantages of the new design are:
- Easier to construct because there is one piece instead of three.
- 6 inch pipe can hold more fuel than 4 inch pipe, and get a warmer fire.
- The handles on the pipe allow you to push the stove right into the earth, compared to having to use a hammer to stake down the pipe like in the old design.
The advantages of the old design are:
- Weighs 6 pounds compared to 20 pounds
- Can compact for transportation if needed
Saturday, November 21, 2015
Let There Be Light - November Idea of the Month
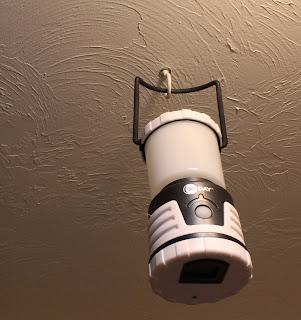
Having a source of light can be helpful in so many ways during an emergency situation. You need light to see for cooking, cleaning, safety, medical situations, and to alleviate fear. Light sticks are inexpensive option and small enough to store easily. Small lanterns are also great.
Since I had white ceilings, I bought white hooks and installed one in every room of the house. Now when the power goes out, I can hang a light stick or a lantern off the hook. Typically light sticks illuminate 10-12 hours, so in a power outage, they make great night lights.
Since I had white ceilings, I bought white hooks and installed one in every room of the house. Now when the power goes out, I can hang a light stick or a lantern off the hook. Typically light sticks illuminate 10-12 hours, so in a power outage, they make great night lights.
*When your light source is higher in the air, it disperses the light more evenly*
Monday, November 9, 2015
Congee
Congee is an Asian recipe using rice that is
over boiled to feed a lot of people with a small amount of rice. This is a good
recipe to use in an emergency because it makes your food supply last longer.
It is filling and quite tasty!
Congee:
9 cups water
¾ cup of rice
1 Tablespoon of salt
1. Slow boil with lid on for 1 ½ hours
2. When done, add whatever else you’d like to it, such
as a can of chili, or hamburger and corn etc.
Light Wash & No Rinse
In an emergency situation, you need to take care of your
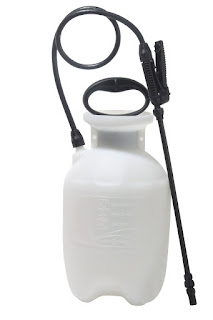
hygiene. To improvise taking a shower with a small amount of water, you can use a new
weed sprayer. This ‘shower’ is very light and because the soap is so diluted,
you don’t need to rinse off.
How to:
1. Acquire a new 2 gallon handheld weed sprayer (example
pictured)
2. Mix 1 Tablespoon of baby shampoo to 2 gallons of warm
water in weed sprayer
3. Use hand pump to supply the sprayer with the pressure
needed to spray
4. Shower as needed
This makes on average 3
showers!
Makeshift Power Supply for Small Items
Losing power is usually one of the first things that happen during a natural disaster.
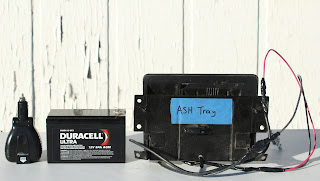
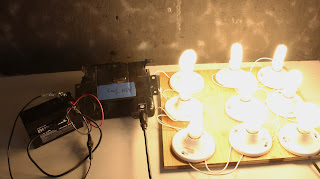
When there is a power outage, you can make a portable power supply just by using an ash tray out of an old car, a 12 volt battery, and a car inverter.
When there is a power outage, you can make a portable power supply just by using an ash tray out of an old car, a 12 volt battery, and a car inverter.
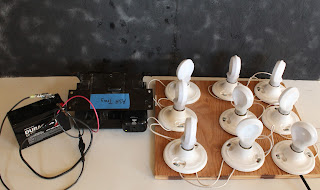
When running a light, LED lights are very efficient; their
energy draw is extremely small. As you can see in this photo, many lights are
being used with a small amount of energy.
How to wire your makeshift power supply:
1. Take the positive wire from the ash tray
*The positive wire is usually red. It is the wire that feeds the little metal post inside the very
bottom of the cigarette lighter socket*
1. Take the positive wire from the ash tray
*The positive wire is usually red. It is the wire that feeds the little metal post inside the very
bottom of the cigarette lighter socket*
2. Attach the positive wire to the positive terminal on the battery.
3. Take the negative wire from the ash tray
4. Attach the negative wire to the negative terminal on the battery.
5. Plug the inverter into the lighter socket.
6. Plug in appliance.
*A power inverter turns DC current into AC current so that you can use an appliance you'd
normally use at home, such as a laptop, in your vehicle. In this case, the
inverter doesn’t just apply to use in a vehicle since we have removed the ash tray.*
Quick Fix: Cracked Canteen or Water Bottle
You may have enough water for an emergency situation. But if your water container gets cracked, having water does you no good.
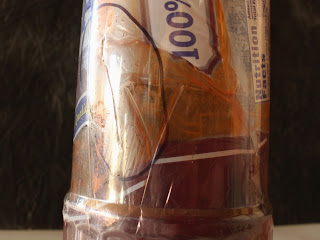
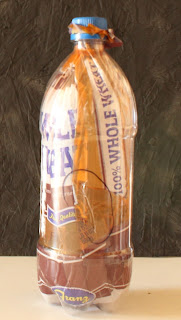
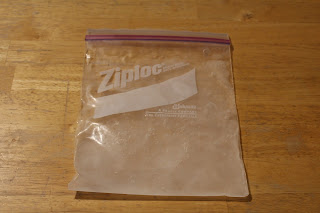
A cracked canteen or water bottle can be repaired by putting a clean plastic bag in the container and then filling the bag with water.
A cracked canteen or water bottle can be repaired by putting a clean plastic bag in the container and then filling the bag with water.
Make sure your bag has no holes!
You can see the big crack in the side of the water bottle above (it is circled in black)
Redneck Water Pre-Filter
All humans need a certain amount of water intake daily. Having access to clean, drinkable water in emergency situations is so important. We are always told to store water for such situations, but that water can run out fast. Another option is to store a water filter.
You can extend the life of your quality water filter by using a pre-filter.
You can extend the life of your quality water filter by using a pre-filter.
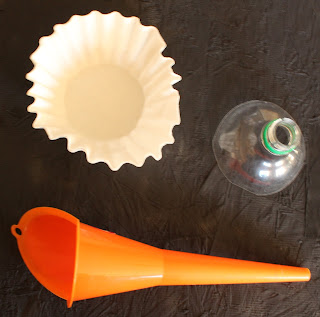
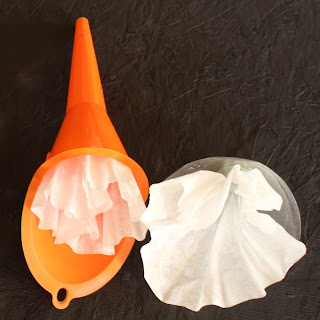
This is done using a funnel and a coffee filter. You can even make your own funnel from the top of a plastic beverage bottle.
Place the coffee filter in your funnel (or bottle top) and poor the dirty water through the coffee filter. This will strain many things out of the water. Then you can run that water through a better filter and have safe water to drink!
Saturday, October 31, 2015
Reader Question
Nancy asked: Ryan, What is the best way to start a fire in a survival situation ?
Nancy,
Thank you for your comment! There are many fire starter ideas out there for starting fires but in really wet conditions I like using a road flare (see picture below). You can buy them at any auto parts store. It burns really hot for a long time and, if your wood is wet, it will dry it out and then start to burn. Let me know if you have any more questions!!
-Ryan
Monday, October 26, 2015
Safety Tips
When there is a major disaster, chances are that hospitals are full and you are going to be on your own. So safety is more important than ever. You can’t afford to get hurt. Here are a few redneck safety tips:
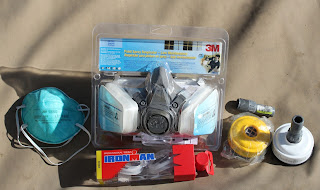
When in a smoky or dusty environment you can use a painter’s mask and swimming goggles to filter the air you breathe. Improvise. A dust mask and swimming goggles would even work. Be creative with your safety and protection
If you are lifting heavy items, make sure that you do it with the assistance of others to help you. For example: using a fan belt to carry items that are odd shaped and difficult to carry etc.
Safety glasses, gloves, hats, etc. can be very helpful in major disaster situations.
Sunday, October 25, 2015
Medical Tips
 In emergencies when hospitals are overrun,
it is very important you know your blood type.
If someone does get injured during a major disaster, here are a few ways you can help using supplies you probably already have.
You can irrigate a dirty wound by poking a hole on top of water bottle lid, tip the water bottle over and squeeze, to force a small stream of water out of hole.
To make soft ice mix use 50% water with 50% rubbing alcohol then freeze the mixture. It’s more form fitting around wound area.
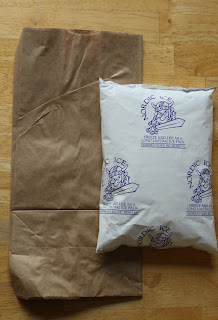
You can also put one of your frozen ice packs in the REFRIGERATOR in a paper sack. Now when you put it on a bump its cold but not so much as to be painful and it also forms around a wound.
Wednesday, October 14, 2015
Poor-Man-in-a-Hurry 72 Hour Kit
- Bag or Suit Case
- Tarp/Plastic
- Blankets, Sleeping Bag, etc.
- Rope or String
- Pot with lid
- Large spoon
- Matches/Lighter
- A couple of Kitchen Knives
- Food from your Cupboards and Fridge in a Cooler
- Water in whatever containers you can find
- Medicine and Band-Aids from your Cupboards
- Winter clothes
- Regular clothes
- Garbage Bags
- Flashlight and Batteries
- Toilet paper, Soap, and a Towel from your Bathroom
- Cell phone and Charger
- Money/Wallet
- Important Documents
*For those who don't know a 72-hour kit is a backpack or suitcase filled with stuff to last you 72 hours. These should be filled with items to get you through a natural disaster until help can arrive.*
Subscribe to:
Comments (Atom)


