Hi everyone! Here is a brief video of our booth at the recent preparedness fair. Pictures are coming soon! If you want detailed information about anything you see in this video please let me know. Thanks!!
Showing posts with label disaster. Show all posts
Showing posts with label disaster. Show all posts
Tuesday, October 9, 2018

Wednesday, August 30, 2017
The Perfect Refrigerator - August Idea of the Month
Most refrigerators are set at around 36 to 40 degrees, but the perfect temperature is right at 32 degrees. However, if you were to set your refrigerator at 32 degrees, the temperature would fluctuate enough that you would most likely end up freezing some foods. This is why most people tend to set their refrigerator temperatures slightly higher so that things stay cold, but not frozen.
If in an emergency, and ice is available, you can actually make a perfect refrigerator. Make this by putting clean ice in a cooler. Then, fill cooler with clean water to the point where it barely covers the ice. Now, put food items in the ice bath in a sealed container.
Make sure to use clean ice and clean water (do not add salt, it changes freezing temperature of water)
This ice water bath keeps food right at 32 degrees but won't freeze it, and provides a longer shelf life to the foods because of colder temperatures.
If you'd like to know the science behind this concept, check this out:
Tuesday, February 28, 2017
Atmit - February Idea of the Month
What is atmit?
“Atmit is a nutritional supplement used to fight famine in impoverished countries. The creamy, nutritious food is indigenous to Ethiopia and is now used to feed the severely malnourished and weakened adults and children. The word atmit originated in Ethiopia and refers to a kind of "thin, nourishing porridge”
My family loves my version of this recipe.
We often eat it for breakfast and make homemade “survival bars” for snacks.
Atmit
- 3 cups oat flour (you can make this by simply dry blending rolled oats in a blender until it is a powder)
- 1 ½ cups powdered milk
- ¾ to 1 cup sugar
Directions:
This recipe can be made many different ways. If someone hasn’t eaten for a few days,
then a thin, runny consistency helps to ease their body back into eating food.
My kids like it thicker—some of them even like it with a bit of milk.
With this in mind, the three ingredients up above are added to boiling water (very similar to making oatmeal or other such breakfast foods). The amount of water varies because of preferred thicknesses.
Atmit survival bars
- Dry atmit mix
- Peanut butter
Directions:
Add small amounts of peanut butter to atmit mix
and stir until you can mold it in your hand without being sticky
Note: additional ingredients of your choice can be added
such as mini chocolate chips, or shredded coconut etc.
Monday, December 12, 2016
Medical Equipment - December Idea of the Month
Most communities don't have the medical capabilities to handle large scale disasters. There are just too many people. So for your church group, preparedness group, or large family it is a really good idea to have at least one set of basic medical testing equipment. When a disaster hits you will possibly have a doctor or nurse in your area, but they will need some of those basic tools to diagnose the sick and injured. A lot of doctors and nurses won't have those tools in their homes. Here is a list of basic testing equipment that you will want to have. All of these items can be bought online. Keep in mind that you will still need first aid supplies to go with it.
- Stethoscope
- Otoscope (for ears)
- Thermometer
- Pulse Oximeter (for monitoring a person's oxygen saturation)
- Glucometer including appropriate strips and lancets (for blood sugar)
- Blood pressure cuffs
- Reflex hammer
- Tongue depressors, preferably wrapped.
- Flashlight
- Masks, Gloves
- Alcohol wipes
- Lubricating jelly
- Alcohol gel for hands
Monday, November 28, 2016
Emergency Irrigation - November Idea of the Month

In an emergency situation, oftentimes you don’t have all of the parts and pieces that you need to build things and access to these parts would be difficult at best.
So thinking outside of the box can really pay off.
PVC Pipe Emergency Drip-irrigation for Garden
Materials needed:
• Heat source (hot coals from a waning fire, briquettes, etc.)
• PVC pipe (I use 3/4”, but any size will work)
• 5 gallon plastic bucket
• Hack saw
• Cotton rags
Directions-
1. Making the point: Take the PVC pipe and the hack saw, cut four slits about 3” long in one end of the pipe. Heat the pipe until soft and mold it tapering to a point (as shown). Let cool and file off excess edges.

2. Making the pipe-stop: Take the other end of that same PVC pipe and cut four slits down about 1” deep, then heat until soft. Smash onto a flat, hard surface so that the end flares outward. Hold until it cools.

This is the finished product:

3. Hole in bucket: Drill a 5/16” hole towards the bottom of the bucket. Then heat the area around the hole until soft. Then take the PVC pipe point that you made earlier and push the point through the small hole from the inside of the bucket. Note: This photo shows only a small part of a bucket purely for demonstrative purposes. You would use the whole bucket to hold the water for the irrigation process.


4. Cutting the point off: The point is used to aid in inserting the pipe through the small hole; but also to form a sealing shoulder on the bucket (as shown here).

Once the pipe has been pushed all the way through to the stop, the point is no longer needed. Cut it off. You will be attaching the rest of the pipes to this first pipe.


5. Making the bell: Take a regular piece of PVC pipe and heat approximately 1” of the end until soft. Then take another pipe and shove it into the soft end of the heated pipe, let cool and then you can pull the second pipe out. This makes a bell-shaped connection so that pipes can be easily connected together.


6. Making elbows (if needed): You may need to make an elbow if you need your makeshift irrigation system to turn a corner. To do this, you need to take a short piece of pipe and put duct tape on one end, then fill the pipe with sand, and then tape the other end shut. Heat the middle of the pipe and then bend it to your desired angle. Once it cools, dump the sand out.
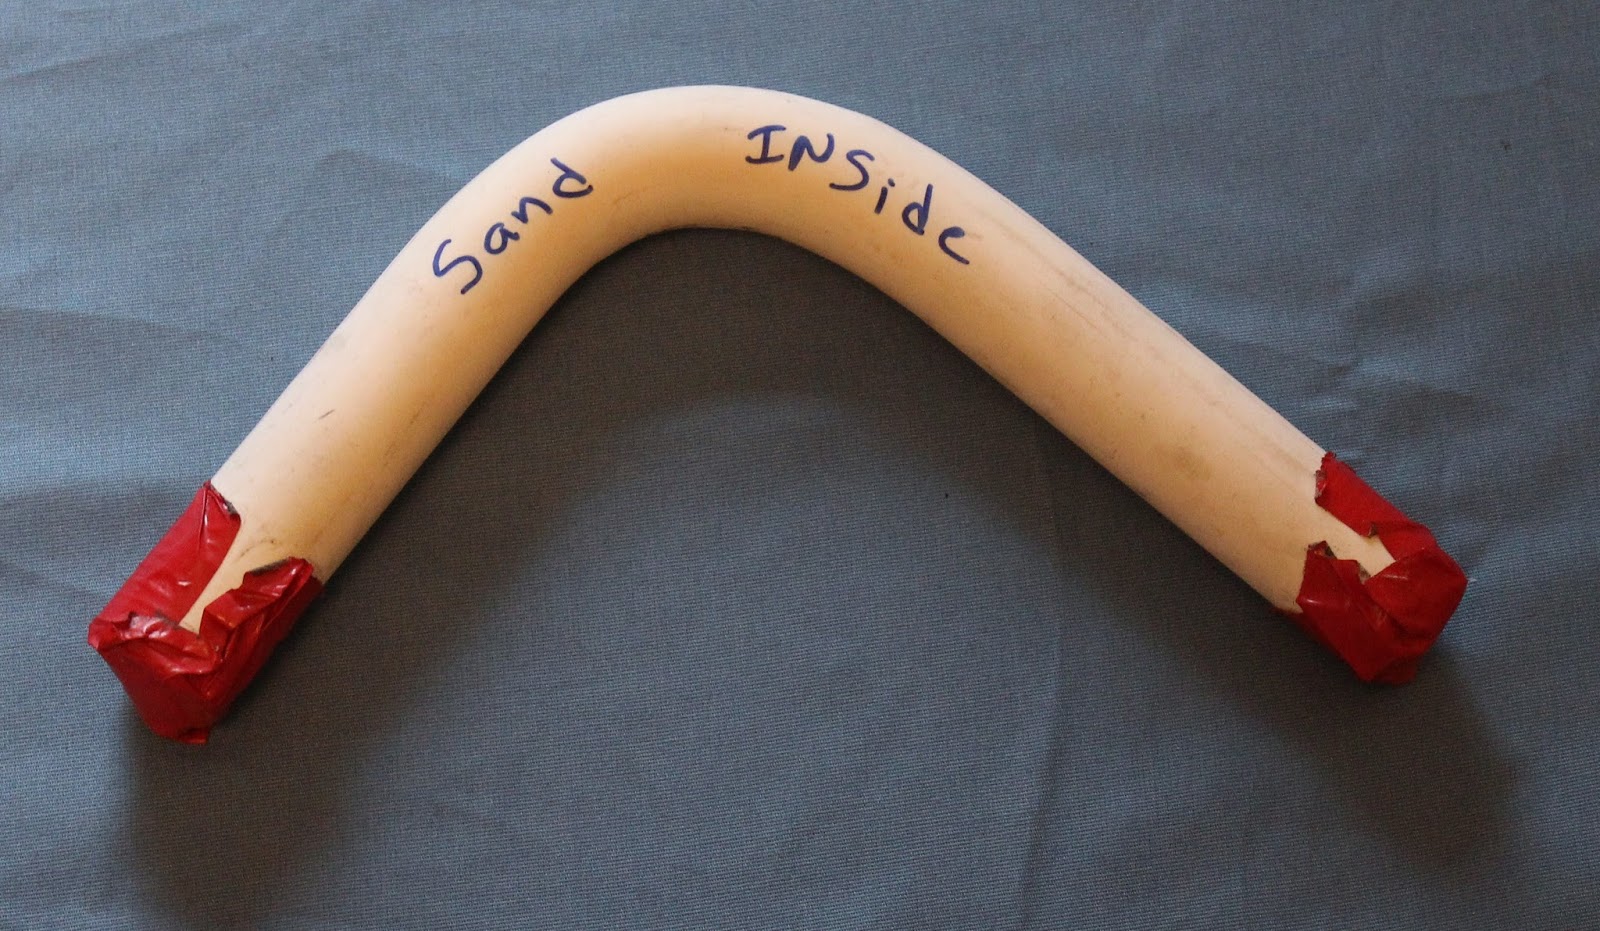
7. Drip pipe: Wherever there is a plant, drill 3/8” holes clear through the pipe. Take a short piece of a cotton rag and roll it to fill the hole with a small amount hanging over both sides.


8. Assembly: Your five gallon bucket holding the dirty water needs to be sitting on something two or three feet in the air so that gravity will feed the water through the pipe. Use cinderblocks or an upside down barrel etc. Start connecting your pipes to the pipe coming out of the bucket and run the pipe alongside the plants. Start drilling holes wherever the plants are and stuff the rags into the holes (The reason why regular drip nozzles won’t work is that they plug with dirty water). At the very end of your system, plug the pipe with something or heat it and smash it until cool. Fill the bucket with water as needed and watch your plants grow.
Afterthought: If you do have steel pipe and desire to connect to the plastic pipes, heat the metal pipe for about 10-15 seconds, shove the metal pipe inside the plastic pipe, and cinch down with a hose clamp on the joint to embed the threads of the steel pipe into the plastic pipe. You can take the hose clamp off once it cools. This also works using plastic bottles if you desire to use them for a funnel or to connect another type of container to your piping system.

Monday, October 10, 2016
Polyester Water Filter

This is an inexpensive, light weight filter for your emergency backpack. It is to be used to filter water before you boil it in an emergency situation. The video below demonstrates that this filter works wonderfully. This filter can be washed and reused for up to 3 years.
It can also extend the life of an expensive water filter by using it as a pre-filter before you run the water through the expensive filter.
Take a plastic empty water bottle that has a smooth neck (highly recommended) and cut off the bottom. Find or buy an article of clothing that is made of 100 percent polyester non-stretchy tight weave fabric. Cut it into 2 inch to 3 inch strips. Get the polyester a little damp and role it into a roll. Make each layer snug but not too tight (If you stretch the fabric, the holes increase in size making it a less effective filter). Make the diameter of the roll big enough to insert into the water bottle. It needs to form a fairly tight seal against plastic.
Then you pour the water into the bottom of the water bottle where you cut it off and it will filter through the fabric and out the top part of the bottle.
If the water has a large amount of sediment, you can do 2 water bottles one on top of the other. You can also put a layer of charcoal between the 2 bottles to eliminate bad odors or odd taste of the filtered water.
The water should have the appropriate amount of bleach, four drops per quart added or heat to a rolling boil (think of the ever-useful survival saying “big bubbles, no troubles”) to ensure that all of the organisms have been killed.
Monday, October 3, 2016
Kill virtually anything in 10 to 20 minutes using Acidified Diluted Bleach
In an emergency situation cleanliness is more important than ever. Hospitals will be overflowing. You can't afford to get sick. Endospores can survive without nutrients. They are resistant to ultraviolet radiation, desiccation, high temperature, extreme freezing and chemical disinfectants.
The American Society for Microbiology did a study that shows Vinegar increases the killing power of bleach. "Diluted bleach at an alkaline pH is a relatively poor disinfectant, but acidified diluted bleach will virtually kill anything in 10 to 20 minutes," says Norman Miner, a researcher on the study. "In the event of an emergency involving Bacillus anthracis spores contaminating such environmental surfaces as counter tops, desk and table tops, and floors, for example, virtually every household has a sporicidal sterilant available in the form of diluted, acidified bleach."
Miner and his colleagues compared the ability of alkaline (pH 11) and acidified (pH 6) bleach dilutions to disinfect surfaces contaminated with dried bacterial spores, considered the most resistant to disinfectants of all microbes. The alkaline dilution was practically ineffective, killing all of the spores on only 2.5 percent of the surfaces after 20 minutes. During the same time period the acidified solution killed all of the spores on all of the surfaces.
Miner recommends first diluting one cup of household bleach in one gallon of water and then adding one cup of white vinegar.
So in addition to storing water and bleach for emergencies I suggest you also store vinegar.
These three items will allow you to effectively keep all surfaces clean and sanitary thus eliminating the risk of sickness.
Source:
Wednesday, July 13, 2016
Survival Cache - July Idea of the Month
_______________________________________________________________________________
Survival Cache [kash]
(noun)
A buried or hidden container that is filled with supplies that can be accessed when needed.
Often placed on someone’s property hidden via burying. They are also placed along evacuation/bug out routes to be accessed when needed during traveling.
_______________________________________________________________________________
Often placed on someone’s property hidden via burying. They are also placed along evacuation/bug out routes to be accessed when needed during traveling.
_______________________________________________________________________________
This survival cache is a perfect way to store needed items in a safe, hidden location. These can be accessed at any time but mainly used for natural disaster situations. Some of the things I put in mine are ammo, dried food, water purifying tablets, medication, a good pocket knife, flint and steel, solar blanket, rope, an empty soup can for boiling water, etc. If for some reason you lost everything and you had a cache somewhere you would have access to some basics with a long shelf life. I have a couple buried. One at the corner of a shed at a friend's house and one on another property. They seal real well since this pipe is made to go into the ground and not leak. You can buy the 4 inch ABS pipe and parts at Home Depot or Lowe's or a plumbing store.

Supplies needed (makes 1 cache):
• 4 inch diameter ABS plastic pipe [you choose length]
• ABS glue
• ABS 4 inch cap [to glue on bottom]
• ABS 4 inch cap [removable to make the top]
• Flathead screwdriver
• Empty 40 oz. Jif peanut butter plastic jars {Note: I’ve found these work perfectly - flat on top and bottom for stacking, they seal real well, good for a second barrier, not too tight or too loose in the 4 inch pipe, they keep things separated, and you have extra containers for water or whatever things you need }
How to:
1. Glue a cap on one end of the pipe
2. Fill jars with your survival products
3. Put top cap on (the removable one) and
tighten with a screwdriver
4. Bury in a safe location. I like to bury them
vertical, but some like horizontal; it is your preference.


I like digging a vertical hole a little bigger than the pipe. Then I set the pipe in the hole and stuff some foam around it to fill the hole. Then I have a small piece of plywood about 12x12 inch that I recess into the soil on top of the hole about 8 inches. I then put dirt on top of plywood so I don't have to dig much to get it out. In an emergency I would dig it up and take the whole thing with me. I could use the pipe for an extra container or something.
I hope this cheap, redneck emergency preparedness idea is useful for you!
Friday, April 1, 2016
Personal Safety - April Idea of the Month
Personal Safety
Have you ever worked in the rain without a raincoat or been out in a snow storm that you weren't ready for? Have you then had to clean up a muddy mess?
Having the right gear and clothing for the situation you are in is so important. I milked cows through out my teenage years and remember many times getting so dirty and so wet working with those cows. It was miserable. One summer I got so wet that I ended up getting pneumonia and spent a few days in the hospital. Back then they put a tent over the bed for pneumonia patients and I remember having to keep straightening the plastic tent so I could watch tv through the plastic. Funny what we can remember from so long ago.
Because of those memories I have realized how important it is in emergency situations to insure safety by having the right gear and protective practices. Having the things you need for personal protection provides a way to keep from cross contamination of sickness or food illnesses. It’s good to have waterproof personal protective equipment for things like cleaning up from sick kids, going in a quarantined room, butchering meat, canning etc. Waterproof equipment is also easy to sanitize with sanitizing wipes, bleach water, paper towels etc. Below is a list I have compiled of items to help you be prepared with the right gear for personal safety.
Having the right gear and clothing for the situation you are in is so important. I milked cows through out my teenage years and remember many times getting so dirty and so wet working with those cows. It was miserable. One summer I got so wet that I ended up getting pneumonia and spent a few days in the hospital. Back then they put a tent over the bed for pneumonia patients and I remember having to keep straightening the plastic tent so I could watch tv through the plastic. Funny what we can remember from so long ago.
Because of those memories I have realized how important it is in emergency situations to insure safety by having the right gear and protective practices. Having the things you need for personal protection provides a way to keep from cross contamination of sickness or food illnesses. It’s good to have waterproof personal protective equipment for things like cleaning up from sick kids, going in a quarantined room, butchering meat, canning etc. Waterproof equipment is also easy to sanitize with sanitizing wipes, bleach water, paper towels etc. Below is a list I have compiled of items to help you be prepared with the right gear for personal safety.

- Heavy duty vinyl waterproof apron(s)
- Rubber over-boots
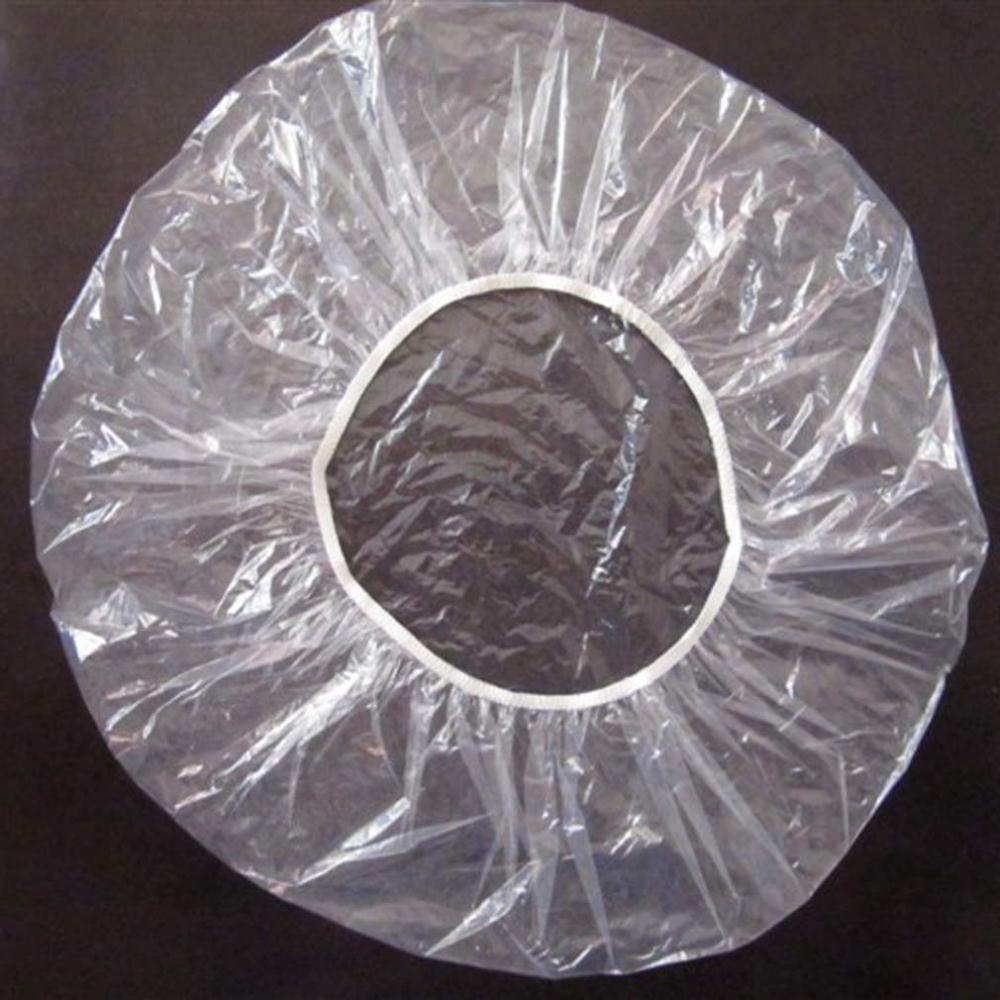
- Shower cap(s)
- Rubber gloves
- Safety glasses
- Mask(s)
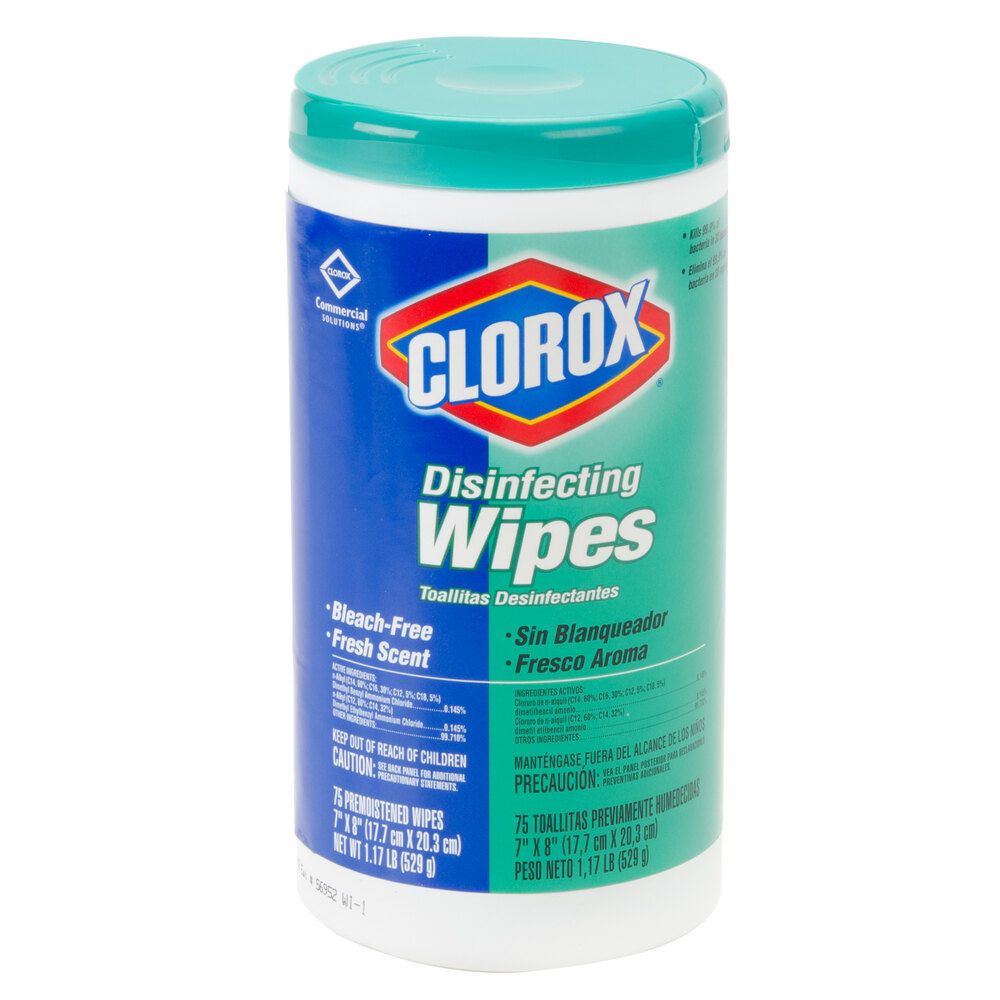
- Sanitizing wipes
Photo credits:





Monday, October 26, 2015
Safety Tips
When there is a major disaster, chances are that hospitals are full and you are going to be on your own. So safety is more important than ever. You can’t afford to get hurt. Here are a few redneck safety tips:
When in a smoky or dusty environment you can use a painter’s mask and swimming goggles to filter the air you breathe. Improvise. A dust mask and swimming goggles would even work. Be creative with your safety and protection

If you are lifting heavy items, make sure that you do it with the assistance of others to help you. For example: using a fan belt to carry items that are odd shaped and difficult to carry etc.

Safety glasses, gloves, hats, etc. can be very helpful in major disaster situations.

Subscribe to:
Posts (Atom)